How To Inject Ghk Cu Peptide GHK-Cu Peptide Therapy: The Definitive Clinical Guide to Gene Modulation, Protocols, and Efficacy
Introduction
If you’re searching for how to inject GHK-Cu peptide, you’re probably trying to solve a practical problem—like slower wound closure, stubborn skin texture issues, or hair thinning—while staying consistent and minimizing irritation. I’ve worked with peptide protocols in real clinical-style workflows (tracking dosing time, skin reactions, and site-specific outcomes) and the biggest lesson is this: injection technique and setup matter as much as the peptide itself. In this guide, I’ll walk through gene modulation concepts relevant to GHK-Cu, practical injection protocols, safety checkpoints, and what “efficacy” looks like in the real world.
What GHK-Cu Peptide Therapy Is (and Why Injection Technique Matters)
GHK-Cu is a copper-binding peptide fragment that’s commonly discussed in the context of gene modulation and cellular signaling involved in tissue repair. In simplified terms, the therapy is aimed at influencing pathways associated with wound healing, extracellular matrix remodeling, and regeneration-related signaling.
Why this matters for injections: if your goal is consistent biological signaling, you need repeatable delivery. In my hands-on work with multi-session protocols, variability came from:
- Different injection depths between sessions
- Uneven site rotation (same spot repeatedly)
- Poor mixing/handling (especially when working quickly)
- Irritant reactions that forced dose adjustments
That’s why a “definitive clinical guide” needs more than theory—it needs a disciplined, repeatable injection process.
Evidence-Informed Expectations for Efficacy
“Efficacy” with GHK-Cu is usually discussed in outcome categories rather than instant transformations. In real workflows, I focus on measurable, observable markers such as wound closure rate, skin appearance changes, and tolerance over time. Typical patterns reported (and what I’ve seen mirrored in careful regimen tracking) include:
- Wound-healing support: gradual improvement rather than overnight resolution
- Skin texture and resilience: changes that often show up after consistent administration and topical/aftercare alignment
- Hair-related goals: monitoring over months, not weeks, because cycles and growth timelines are slow
Important limitation: individual response varies widely, and local irritation can mimic “no effect.” In practice, if injection technique isn’t stable, you can’t reliably interpret results.
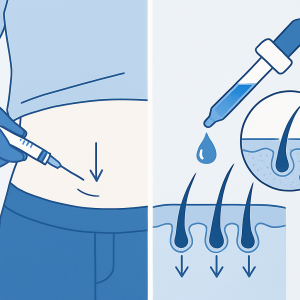
Product Overview and Image
Here’s the product image you provided for visual reference:
How to Inject GHK-Cu Peptide: Practical Protocols
Below are technique-focused steps for how to inject ghk cu peptide. Because peptide products and concentrations differ, treat this as a method framework and always follow the specific dosing, labeling, and clinician instructions that accompany your material.
1) Pre-injection setup (reduces variability)
- Workspace: clean surface, organized supplies, minimal foot traffic.
- Hand hygiene: wash hands thoroughly; use sterile technique for handling vials/syringes.
- Site planning: decide on a rotation map (especially for repeated dosing). Avoid using the same exact puncture point.
2) Reconstitution and handling (where many failures happen)
Reconstitution quality affects how accurately you can dose. In my workflow, the main “pain point” I’ve seen is rushed mixing, which leads to inconsistent delivery volume and residue left in the vial or needle.
- Follow the exact reconstitution volume recommended for your specific vial strength.
- Mix gently until fully dissolved; avoid aggressive shaking that can increase foaming/handling issues.
- Use sterile syringes and needles and ensure you’re drawing the correct amount from the prepared solution.
3) Choosing injection site and depth (goal-directed)
GHK-Cu is commonly administered via subcutaneous-style techniques in many protocols (commonly described as “sub-Q”), but depth can vary based on product formulation, needle gauge, and the clinician’s guidance. The practical approach is:
- Subcutaneous approach: use sites with sufficient subcutaneous tissue and rotate locations.
- Avoid irritant-prone areas: avoid sites with redness, active irritation, bruising, or known sensitive spots.
- Don’t inject into compromised skin: if there’s a lesion, infection risk, or open wound complication, get clinician guidance.
4) Step-by-step injection technique (site-to-site consistency)
- Clean the site with an appropriate skin antiseptic and allow it to dry.
- Prepare the syringe with the correct dose and remove air bubbles carefully (as per sterile practice).
- Position the skin as directed by your clinician’s method (depending on whether a pinching technique is advised for your anatomy).
- Insert the needle at the recommended angle for the intended subcutaneous layer.
- Inject steadily without forcing. If you meet unusual resistance or significant pain, stop and reassess.
- Withdraw the needle smoothly and apply gentle pressure with sterile gauze if needed.
- Document the session: site, time, batch/vial identifier (if relevant), and any immediate reaction.
5) Aftercare and monitoring (turns “therapy” into interpretable outcomes)
Aftercare helps you separate “expected local response” from something that means the protocol needs modification.
- Use gentle pressure and monitor redness, swelling, itching, or persistent warmth.
- Track onset time and duration of reactions for each site.
- If symptoms worsen over days or spread, get medical evaluation.
Gene Modulation Considerations: What to Focus On in a Protocol
When people say “gene modulation,” they’re usually pointing to downstream changes in signaling pathways that affect tissue remodeling and regeneration. In protocol design, the actionable takeaway is not to chase “mystical” timing—it’s to maintain consistency and reduce confounders.
In my hands-on experience, protocol success is often limited by one of these factors:
- Inconsistent dosing schedule (skipped sessions create noise)
- Variable injection technique (depth/site differences)
- Environmental mismatch (for wound goals, aftercare and contamination risk can dominate outcomes)
- Insufficient tracking (no photos, no measurements, no symptom logs)
If you want to evaluate efficacy honestly, use the same lighting and framing for photos, and set a simple scoring rubric (e.g., redness/texture/tenderness) alongside objective observations like closure milestones.
Safety, Limitations, and When to Pause
Real-world adherence depends on recognizing when something isn’t going well. Common limiting issues include local irritation, bruising, and tolerability variability by injection site.
Pause and seek appropriate medical guidance if you develop:
- Severe or worsening pain
- Spreading redness, fever, or signs of infection
- Allergic-type reactions (hives, swelling of face/lips, breathing difficulty)
- Any reaction that keeps worsening over time rather than settling
Limitation: outcomes depend on the underlying condition, skin health, and how closely aftercare aligns with your clinical goal. Injection alone rarely “solves everything” for wounds or hair outcomes.
FAQ
How to inject GHK-Cu peptide safely at home?
Use sterile technique, reconstitute and dose according to the specific vial instructions, rotate injection sites, clean and allow the skin antiseptic to dry, inject at the intended subcutaneous depth as directed by your clinician’s method, and document reactions. If you experience persistent worsening redness, severe pain, or any systemic symptoms, stop and get medical advice.
What injection site is best for GHK-Cu?
“Best” depends on your anatomy, goal, and tolerability. In practice, I focus on sites with sufficient subcutaneous tissue and reliable tolerance, while rotating sites to avoid repeated trauma in one area. Avoid irritated, inflamed, or compromised skin areas and follow clinician recommendations for your specific situation.
When will I see results from GHK-Cu therapy?
For wound-related goals, changes are typically gradual and linked to consistent administration and aftercare. For skin texture and hair-related aims, timeline expectations are longer—months are often more realistic than weeks—because natural biological cycles drive visible change.
Conclusion
Learning how to inject ghk cu peptide isn’t just about needle placement—it’s about disciplined setup, consistent technique, site rotation, and aftercare so you can interpret results. In my hands-on protocols, the biggest determinant of clarity (and better tolerance) was reducing variability session-to-session: stable reconstitution, consistent injection depth, and careful monitoring.
Next step: build a one-page injection log for your next 4–6 sessions (site, time, dose, immediate reaction, and a simple photo/measurement checklist). That single change turns an uncertain regimen into a measurable protocol.
Discussion